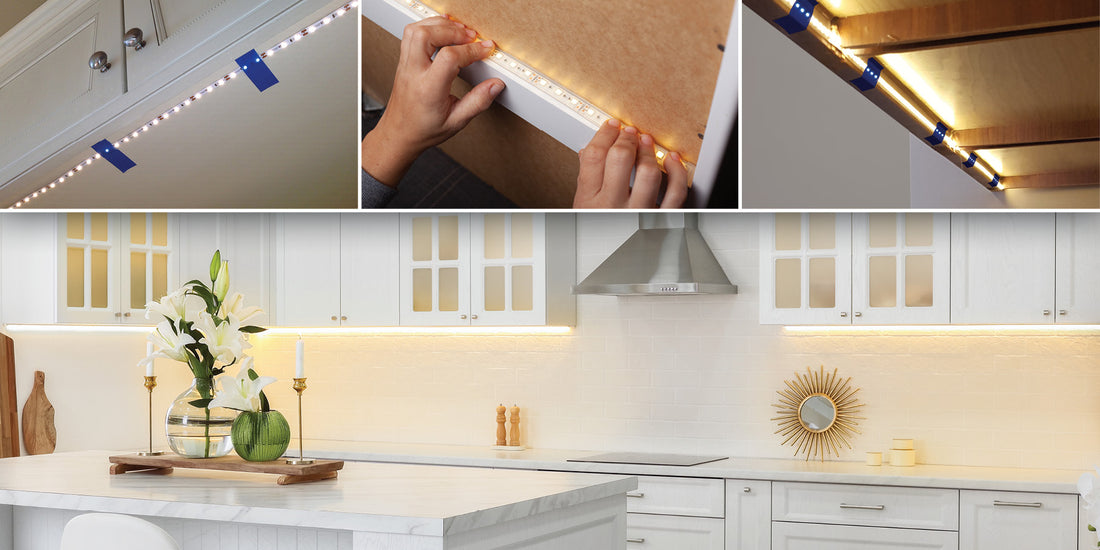
LED Light Strip Placement Options for Under Cabinet Lighting
For maximum light on countertop
Mount the LED tape towards the front of the cabinet with LEDs facing down. To focus light on the work surface and also light your backsplash, position the tape light an inch or two back from the front of the cabinet. This mounting position works best with dull or matte finished surfaces.

LEFT: LEDs facing countertop; RIGHT: LEDs facing backsplash
If countertop is reflective
Install the LED tape lighting on the inside back of the cabinet lip frame with the LEDs facing towards your backsplash. This method helps eliminate unwanted light reflections and bright spots reflecting off your countertop. Because of the wide beam angle of the tape light, this mounting position will still provide ample lighting.
Continuous run mounting
Drill a 1/2 in. hole through the cabinet side frame lips to allow the tape light to pass from one cabinet to another. When mounting on the back side of the front frame lip, use a multi-tool oscillating saw to make small vertical cuts in the dividers to create slots for the tape light to pass through.

If cabinet or shelf has no bottom lip
Create a visual barrier to hide the LED lights with a piece of angle trim, quarter round molding, or any type of trim desired.

LED Strip Lighting for Above Cabinet Uplighting
Most cabinet tops have uneven surfaces. To create beautiful, indirect uplighting over cabinets, simply mount the tape light on any rigid strip (e.g., thin lattice or corner guard molding) and place on top of cabinets. Angle the light strip position to achieve the desired illumination.

LED Tape Light for Cove Lighting
Try different mounting positions to get your desired lighting effect. For a seamless glow with no bright light spots, keep LED tape light strip at least 3/4 in. away from walls.

Testing the Position of Strip Light Installations
To test the position of the strip light installation before mounting, power the LED tape light and temporarily hold or tape into position with painter’s tape – do not remove the 3M paper backing. Do not stare directly at the LEDs.

Try various angles and positions to get the desired level of illumination and lighting appearance. If the LEDs create undesirable bright spots on walls or reflections, reposition the tape light strip farther away from surfaces or try a different mounting angle.
Surface Preparation Tips for Mounting LED Strips
-
Mounting surfaces should be smooth, clean, completely dry, dust free and above 60ºF (15 ºC) before sticking the LED tape strip into place. Thoroughly clean all mounting surfaces with isopropyl alcohol. Do not use common rubbing alcohol and household cleaners, which may leave behind residues.
-
For best adhesion, lightly sand the surface where you will mount the tape lighting with fine grit sandpaper (150-300 grit). Sand in a circular motion rather than straight-line motion.
-
When installing on painted surfaces, paint should be fully cured based on manufacturer’s cure time.
-
Be careful not to peel off the 3M adhesive from the LED strip; just remove the tan paper backing.
-
3M two-sided tape requires pressure to activate the adhesive. Working from one end to the other, firmly press the tape down with your fingers, taking care not to press on the individual LEDs.
For more information or for help with your project, please reach out to the Armacost Lighting Customer Support team.


